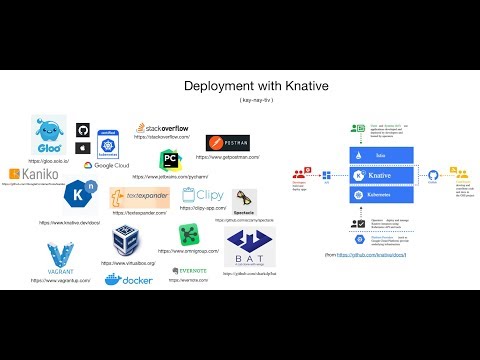
Knative demo using Gloo
Kubernetes on Google cloud to exercise Knative using Solo.io’s Gloo.
I became curious about Knative and decided to try it out on Google cloud’s GKE, using Gloo instead of Istio.
As well explained by Diogenes in the article “Gloo, by Solo.io, is the first alternative to Istio on Knative”:
"Gloo is a Next Generation API Gateway that meets the needs of
Knative while not bringing the unneeded baggage of a full-blown
Service Mesh technology, which is the case with Istio."
Screencast
If you are interested in a short video that demonstrates this adventure, use the link below. Otherwise, read on for more details.
The flavio-fernandes/knative_demo Github repo contains the steps and slides used in the video.
Prerequisites
In order to make this easy to reproduce, I am deploying a virtual machine provisioned by Vagrant as the interface to the Kubernetes cluster. So, start off by making sure you have these installed in your system:
- Hypervisor (compatible with Vagrant)
- Git
- Vagrant
Provisioning
$ KND='knative_demo.git' ; \
git clone git@github.com:flavio-fernandes/$KND $KND

$ cd $KND && \
git clone git@github.com:flavio-fernandes/flaskapp.git flaskapp.git
Optional: Edit Vagrantfile
This section is only necessary if you are interested in pushing changes from the VM to your git repository. I used this in the screencast to show you how to make Knative build from source. There is more on that further down in this page.
As part of provisioning the VM, Vagrant will copy a specific ssh key file for pushing changes into Github. You may choose to skip that by commenting out these lines. Otherwise, tweak them to point to the proper file in your environment.
Also, change the user section in files provisioning/git_config and provisioning/ssh_config to make this you.
Start VM
# cd to where you cloned knative_demo.git and boot VM
$ time vagrant up  ; # takes ~5 minutes in my Mac laptop at home

# Save a snapshot. You can create multiples of these
$ vagrant snapshot save freshAndClean1

# If you ever need to restore from snapshot:
$ vagrant snapshot restore --no-provision freshAndClean1
Authenticate with your Google Cloud Account
At this point, ssh into the VM and follow the steps needed to manage a cluster in GKE.
$ vagrant ssh

# From inside VM

# NOTE: Tweak these values to what suits you better!
$ cat << EOT >> /home/vagrant/.bashrc_me
export PROJECT=knative-proj
export CLUSTER_NAME=knative1
export CLUSTER_ZONE=us-east1-d
EOT

$ source /home/vagrant/.bashrc_me ; echo $PROJECT

# These commands will setup the needed files in the VM
# to connect you to your Google account. Simply copy and paste
# the verification code as mentioned in the instructions
$ gcloud auth login  && \
gcloud auth application-default login && \
echo ok

# If the project does not exist, create it and link it to
# your billing via the Google console
$ gcloud projects create $PROJECT --set-as-default
# On browser, open https://console.cloud.google.com/
# Select Billing ==> Link billing account to project

# Back in VM shell, do these final commands to store the
# Goggle project settings
$ echo $PROJECT ; gcloud config set core/project $PROJECT && \
gcloud config set compute/zone $CLUSTER_ZONE

# Enable services needed
$ gcloud services enable cloudapis.googleapis.com && \
gcloud services enable container.googleapis.com && \
gcloud services enable containerregistry.googleapis.com && \
echo ok

# Setup docker auth to use Google account
$ gcloud auth configure-docker --project $PROJECT --quiet
Okay! The VM is authenticated with Google and you may want to save another snapshot of it should you need to jump back to this state. This is as easy as doing these commands:
# Get out of VM shell, back to your main system
$ exit

$ vagrant snapshot save freshAndClean2

# If you ever need to restore from snapshot:
# vagrant snapshot restore --no-provision freshAndClean2
Flask Application
The flaskapp.git repo gives us an application that you can containerize.
The VM should have all you need in order to try it out before pushing it as a docker image to the cloud. That includes the port forwarding, so you can access it from your local browser. Here are the commands you can do to make sure it is working:
$ vagrant ssh

# From inside VM

# The app could not be simpler. Here is the bulk of it
$ bat /vagrant/flaskapp.git/src/{app,utils}.py

# Run it from VM
$ cd /vagrant/flaskapp.git/src && \
TARGET=fromVagrantVM FLASK_DEBUG=1 FLASK_APP=app.py \
flask run --host 0.0.0.0 --port 8080

# To stop it, simply <control>+c
From your local browser, open http://localhost:8080/json
Docker was installed as part of provisioning, so you can also try running the app from a container in the VM. The Dockerfile used is uncomplicated.
By the way, I will get to Knative soon enough! Hang on just a little more :)
# Still inside VM
$ bat /vagrant/flaskapp.git/Dockerfile

# Build a docker image
$ cd /vagrant/flaskapp.git && \
docker build -t flaskapp . && \
docker images

# Start it locally
$ docker run -e "TARGET=flaskappFromDocker" -d --rm -p 8081:5000 \
--name flaskapp flaskapp

$ docker ps

# To stop it, type
$ docker stop flaskapp
From your local browser, open http://localhost:8081/json
Pushing app as a docker image into Google Cloud
Let’s tag and push the docker image to a place where the Kubernetes cluster can reach it. The gcloud auth configure-docker command from a few steps back is all you needed to have push capable of storing the image in gcloud. Later on, I will show you how you can use Knative to automatically build the image, but I won’t get ahead of myself.
# Still inside VM
$ cd /vagrant/flaskapp.git/ && docker build -t foo .

# gcr.io/${PROJECT}/foo:latest
$ docker tag foo gcr.io/${PROJECT}/foo:latest && \
docker push gcr.io/${PROJECT}/foo:latest

$ gcloud container images list --repository=gcr.io/${PROJECT}
You should be able to see the pushed image under https://console.cloud.google.com/ ==> container registry ==> images
An important caveat here is that the project is part of the image name. Pay attention to that when you start referring to it from the yaml files!
Deploy the Kubernetes Cluster (the easy way)
Deploying the cluster is as easy as invoking this command:
# This takes about 3 minutes... Good time for getting a coffee refill?!?
$ CLUSTER_VERSION='latest' ; \
time gcloud container clusters create $CLUSTER_NAME \
--zone=$CLUSTER_ZONE \
--cluster-version=${CLUSTER_VERSION} \
--machine-type=n1-standard-4 \
--enable-autoscaling --min-nodes=1 --max-nodes=10 \
--enable-autorepair \
--scopes=service-control,service-management,compute-rw,storage-ro,cloud-platform,logging-write,monitoring-write,pubsub,datastore \
--num-nodes=3

# You should now see your newly constructed K8 cluster!
$ gcloud container clusters list

# Store the cluster credentials
$ gcloud container clusters get-credentials ${CLUSTER_NAME} \
--zone ${CLUSTER_ZONE} --project ${PROJECT} ; \
grep --quiet "gcloud container clusters get-credentials" /home/vagrant/.bashrc_me || \
cat << EOT >> /home/vagrant/.bashrc_me
gcloud container clusters get-credentials ${CLUSTER_NAME} --zone ${CLUSTER_ZONE} --project ${PROJECT}
EOT

# Set rbac.authorization
$ kubectl create clusterrolebinding cluster-admin-binding \
--clusterrole=cluster-admin \
--user=$(gcloud config get-value core/account)
Install Gloo (instead of Istio)
Knative relies on service mesh’s VirtualService. In order to fulfill that requirement in this cluster, you can just deploy Gloo. The glooctl application has already been provisioned in the VM, so this is all that is left for us to do:
$ glooctl --version && time glooctl install knative && echo ok

# Looking at the namespaces in the cluster, you can see that these
# two are now created
$ kubens ; \
kubectl get pods --namespace gloo-system ; \
kubectl get pods --namespace knative-serving

# Wait for an IP address to be provided to the LoadBalancer service
$ kubectl get services -n gloo-system | grep -i LoadBalancer | \
grep -i pending --quiet && echo 'pending... try again' || \
echo 'got ip. yay!'

# Once IP is obtained, keep it handy
$ grep --quiet CLUSTERINGRESS_URL /home/vagrant/.bashrc_me || \
echo 'export CLUSTERINGRESS_URL=$(glooctl proxy url \
--name clusteringress-proxy)' >> /home/vagrant/.bashrc_me ;
[ -z "$CLUSTERINGRESS_URL" ] && source /home/vagrant/.bashrc_me ; \
echo "CLUSTERINGRESS_URL: $CLUSTERINGRESS_URL"
Deploying application in K8 Cluster
You can now have fun running applications in the cluster just by using the pre-canned yaml files located in the k8s folder.
Important (2nd time): Pay close attention to the image value in these yaml files. They must contain the $PROJECT you want to use as part of their path.
Non-Knative way
Just for comparison sake, you can see below the canonical (old-school) way of having a deployment in Kubernetes.
$ cd /vagrant/k8s && bat foo.yaml
Deploying the same exact app through Knative
This little yaml is equivalent to foo.yaml shown above, and more!
$ cd /vagrant/k8s && bat foo-knative-1.yaml
Monitor default namespace
Before deploying anything, it may be useful to create a new shell inside the vagrant VM. Then, use that shell to monitor what is running in the cluster’s default namespace. I suggest doing this:
$ vagrant ssh

$ watch kubectl get deployment,pod,service
Postman
If you are interested in using Postman to interact with the app similar to the one on this page, here is a link to the Postman collection I used:
https://www.getpostman.com/collections/a188153f25a286789b28
You can also import from the collection file I added to the Github repo, under the slides directory.
Yet another way for getting this collection is by pressing on the orange looking button here:

Launch application with the old-school method
Let’s create foo.yaml deployment and interact with it using a temporary ubuntu pod.
# From Vagrant VM
$ cd /vagrant/k8s && \
kubectl create -f foo.yaml

# Start ubuntu pod and get inside of it
$ kubectl run -i --tty --rm ubuntu --image=ubuntu:16.04 \
--restart=Never -- bash -il

# Install curl and dig in ubuntu pod
$ apt-get update >/dev/null 2>&1 && apt install --quiet -y \
curl dnsutils >/dev/null 2>&1 && echo ok

# Grab CLUSTER-IP for the service named 'foo-np' and assign it
# to CLUSTER_IP
$ export PORT=${PORT:-8080} ; \
export CLUSTER_IP=$(dig foo-np.default.svc.cluster.local +short)

# Reach deployment within cluster
$ while : ; do \
curl http://${CLUSTER_IP}:${PORT}/json?delay=750 \
-H 'cache-control: no-cache' ; \
done

# Once you are ready to stop,
# <control>+c and then type `exit` to terminate ubuntu pod and
# get back into VM shell

# If you want, you can terminate the deployment by doing
$ kubectl delete -f foo.yaml
Launch same application using Knative service
# From Vagrat VM
$ cd /vagrant/k8s && \
kubectl create -f foo-knative-1.yaml

# Look, mom: I can reach the app from the outside world!
$ http ${CLUSTERINGRESS_URL}/json?delay=150 \
'Host:foo-example-knative.default.example.com' -v -s fruity

# Make app crash and cause k8 to restart it
$ http ${CLUSTERINGRESS_URL}/json?boom=kaboom \
'Host:foo-example-knative.default.example.com' -v -s fruity

# You can terminate the foo knative service (ksvc) by doing
$ kubectl delete -f foo-knative-1.yaml
An interesting Knative behavior is the scaling to 0. It means that if the application sits idle for a while, its pod is terminated in order to save cluster resources. It is 5 minutes by default, but you can customize it. As expected, the pod restarts on demand.
Can you see how Knative leverages the power of service mesh? The idea behind it is to give you ingress and scaling capabilities with minimum complexity. Let’s move onto other awesome features you can tap into.
Blue-green demo
There are 3 parts to the Serving capabilities in Knative. They are depicted here:

A service in Knative automatically manages route and configuration, but nothing stops us from doing the same via the yaml file. Let’s exercise that by doing a blue/green experiment. From the k8s folder, get started by applying the following file in order to have an application that is 100% routed to the blue revision.
$ cd /vagrant/k8s && bat blue-green-demo-1.yaml

$ kubectl apply -f blue-green-demo-1.yaml

# Taking a look at the routes and configuration you just started
$ printf "ksvc\n" ; kubectl get ksvc ; \
printf "\nroutes\n" ; kubectl get routes.serving.knative.dev ; \
printf "\nconfiguration\n" ; \
kubectl get configurations.serving.knative.dev

$ kubectl get routes.serving.knative.dev -oyaml | \
  grep -A666 'status:' | grep -A6 'traffic:'
Next, introduce the green route but keep its traffic at 0%. You will see a new deployment revision, but no traffic will use it unless you explicitly use the host header prefixed with v2, which was provided as the name under revisionName blue-green-demo-00002 (the last line in that file).
$ cd /vagrant/k8s && bat blue-green-demo-2.yaml

$ kubectl apply -f blue-green-demo-2.yaml

# This will give us a blue
$ curl --silent -X GET ${CLUSTERINGRESS_URL} \
-H 'Host: blue-green-demo.default.example.com' \
-H 'cache-control: no-cache' | grep 'div class='

# This will give us a green because of the host header
$ curl --silent -X GET ${CLUSTERINGRESS_URL} \
-H 'Host: v2.blue-green-demo.default.example.com' \
-H 'cache-control: no-cache' | grep 'div class='
To make this interaction more interesting, consider starting a new ssh session that periodically fetches from the blue-green-demo deployment. You should see this changing as you try out the commands that follow.
$ vagrant ssh

$ while : ; do \
curl --silent -X GET ${CLUSTERINGRESS_URL} \
  -H 'Host: blue-green-demo.default.example.com' \
  -H 'cache-control: no-cache' | grep 'div class=' ; \
sleep 1 ; \
done
By tweaking the percent value of traffic in the route section, you can dictate the pod “color” that responds to the requests.
# Try these in any order and see how the behavior changes.
$ kubectl apply -f blue-green-demo-2.yaml  ; # blue only
$ kubectl apply -f blue-green-demo-3.yaml  ; # blue and green
$ kubectl apply -f blue-green-demo-4.yaml  ; # green only

$ kubectl get routes.serving.knative.dev -oyaml | \
  grep -A666 'status:' | grep -A6 'traffic:'

# Delete blue-green pods
$ kubectl delete -f blue-green-demo-2.yaml
Automatically build docker image from source code
Knative allows us to build the container from source and then use that for its deployment. There are multiple build templates that you can choose for doing that job. The best template depends on what you are building, so take your time looking for the one that meets your needs. For the sake of building our little foo application, Kaniko is more than enough. Let’s get started by getting the knative-build namespace going:
# Adding the Knative Build component
$ kubectl apply --filename \
  https://github.com/knative/build/releases/download/v0.4.0/build.yaml

# Watch build-controller and build-webhook get to Running state
$ kubectl get pods --namespace knative-build ; # --watch

# Install the Kaniko build template
$ kubectl apply --filename \
https://raw.githubusercontent.com/knative/build-templates/master/kaniko/kaniko.yaml

# Plugins should list Kaniko now
$ kubectl get buildtemplates.build.knative.dev
Docker Secrets
Instead of pushing the built image into GCP, let’s make Kaniko push into my repo in Dockerhub. Being such, the first thing to do is to make my secrets available to Kaniko via a yaml file that I should keep privately. Here is an example of how you can create such a secret file and then feed into the cluster:
$ cd /vagrant/k8s/autodeploy && \
  bat docker-secret.yaml.example service-account.yaml

# Instead of flaviofdocker use your id in Dockerhub
$ U=$(echo -n 'flaviofdocker' | base64)

# Instead of TRUSTNOONE use your password in Dockerhub
$ P=$(echo -n 'TRUSTNOONE' | base64)

# Use the template file and populate the proper fields with secrets
$ cp docker-secret.yaml{.example,} && \
  sed -i -e "s/BASE64_ENCODED_USERNAME/${U}/" ./docker-secret.yaml && \
  sed -i -e "s/BASE64_ENCODED_PASSWORD/${P}/" ./docker-secret.yaml

# Create a service account called 'build-bot', which uses the
# secrets from docker-secret.yaml. This service account will
# be used by Kaniko when pushing the built image
$ kubectl apply -f docker-secret.yaml && \
  kubectl apply -f service-account.yaml
You are getting there! To convince yourself that the image was really built from source, let’s change something noticeable about it and push that change to the git repository.
# Check out the branch that you will have Kaniko pulling from
$ cd /vagrant/flaskapp.git && \
  git checkout knativeDemo

# Change release
$ sed -i -e 's/^ENV RELEASE=.*$/ENV RELEASE=the.best.yet/' \
  Dockerfile && \
  git diff Dockerfile

# Commit and push the change to Github
$ git commit -a -m 'Dockerfile: Change release' && \
  git push
Now that you have source and the access to Dockerhub, pay close attention to the watch session in your terminal when you apply the yaml file that triggers Kaniko into action.
# Look at the diff from the initial Knative version of the app
$ cd /vagrant/k8s && \
  diff -u foo-knative-{1,2}.yaml | bat -l diff && \
  bat foo-knative-2.yaml

# Kick off the build. Keep eye on watch session in your terminal to
# see the pod launched to do the build from the default namespace
$ kubectl apply -f foo-knative-2.yaml

# Observe the build results
$ kubectl get builds foo-example-knative-00001 -oyaml | \
  bat -l yaml

# Request for the application should output the expected release
$ http ${CLUSTERINGRESS_URL}/json \
  'Host:foo-example-knative.default.example.com' -v -s fruity
Just for the fun of it, revert back to the image that is still available in Google Cloud, and then back again to the one built via Kaniko. And then again!
$ cd /vagrant/k8s && \
  for ymlver in 1 2 1 2; do \
    kubectl apply -f foo-knative-${ymlver}.yaml
    sleep 10
    http ${CLUSTERINGRESS_URL}/json \
    'Host:foo-example-knative.default.example.com' -v -s fruity ; \
  done

# Delete all revisions of this Knative Service
$ kubectl delete -f foo-knative-2.yaml
Final Cleanup
I hope you have as much fun with Knative as I do. My apologies for not getting into Knative eventing in this page… Maybe in a future blog? If you are done using the cluster, these commands can be used to clean things up and avoid surprise charges from Google.
# Remove K8 cluster
$ time gcloud container clusters delete $CLUSTER_NAME --zone $CLUSTER_ZONE

# Remove docker image
$ yes | \
gcloud container images delete gcr.io/${PROJECT}/foo:latest --force-delete-tags

# If you also want to get rid of the project in google account...
$ gcloud projects delete $PROJECT

# Exit out of vagrant VM, back to the directory where
# Vagrantfile is located
$ exit

# To gracefully shutdown VM
$ vagrant halt

# To blow VM and snapshots away
$ vagrant destroy --force
Cheers!